Pages

Showing posts with label how-to. Show all posts

Wednesday, August 21, 2013

"They're Hooked!" Bridal Shower

At the church I attend, I am the party planner. If someone is getting married or having a baby I am in charge of throwing them a shower from the church. Well we recently had a couple announce that they were getting married so I got to work. My first task was to figure out what I was going to theme their shower around and after finding out that they were having there wedding at the beach I knew I wanted it to be nautical themed. But I thought it would be a little random to have just a nautical themed wedding shower, so I decided to go with the "they're hooked!" theme.

Pinterest was my first stop to find idea but there weren't many pins for nautical bridal shower. So I was stuck with good ole fashioned creative brainstorming. This is what the bridal shower food was set up like:

I used streamers (light blue, navy, and green) to give a backdrop from the ceiling to the floor behind the food table. Randomly I placed little orange foam fish on the streamers so it looked like we were under the water. I also found a fish net at the dollar store and set that on top of the table to make it look even more nautical. These fishnets were also added to the tables everyone sat at along with jars filled with sticks in the the center of their tables (I didn't get a picture of them sadly). Now the food :)...


To start out I had marshmallow bobbers which were just marshmallows that I dipped in red chocolate and then added a red candy ball to the tops and stuck them onto popsicle sticks. I then, for decoration, stuck them in a basket with foam and then covered the foam with craft moss. Pretty cute Eh?!


I called these little guys tackle cups! Basically it was plastic punch cups with ranch in the bottom filled with celery and carrots.


I also made cupcakes with these fun cupcake liners that looked like water and frosted the cupcakes with a light blue frosting. I topped them off with pieces of a red candy that I frosted to a string and then frosted the other end of the string to the top of a popsicle stick and stuck into the cupcake. I placed the cupcakes on a cupcake stand I made out of stove burner covers and a candle stick (from the dollar store).


You can't have a shower without fruit! Yum! Here I took a fish cookie cutter I got from Joanns and cut out chuck of watermelon to look like fish. I then stuck them on a kabobs stick along with some green grapes.


These chicken salad sails are, as you can probably guess on your own, simple chicken salad sandwich slices. I just gave them the name to go with the theme. For some reason just calling them chicken salad sandwiches just didn't sound creative enough ;).


On to the deviled eggs! These I turned into little boats by adding a small slice of green bell pepper to the top as a sail.


And last but not least! the punch. This was made out of 1/3 lemonade, 1/3 blue raspberry punch, & 1/3 ginger ale. 

And that's it folks! Everything went super well and everyone loved the food. I was glad I was able to have everything look so wonderful with a small budget and a small amount of time to set everything up.


Tuesday, July 23, 2013

Easy DIY Bamboo Curtain

Since me and my little family had recently moved into our new little farm house I've noticed that we have ZERO curtains for our windows. I'm a big fan of anything with wood tones that's very simple like roman shades. I have recently made some roman shades for the living room/dining room area down stairs and they turned out beautifully. However, in our master closet upstairs we have 2 windows which have become a problem for my husband because he is concerned that the sun will bleach our clothes over time if we didn't put up some window treatments. So I didn't want to spend a lot of money on fixing them up because...well...the two windows are in a closet for goodness sake.

While at my local supercenter, I stubbled upon some bamboo beach mats and thought "This is it! I'm going to make my shades out of these!" So I bought 2 beach mats, 2 tension rods, and got home as quick (and safely :D ) as I could. While in the process of making the shades I thought that this would be a great opportunity to make a LONG OVERDUE tutorial. So here we go!


Materials you will need:
  1. 1 bamboo mat (1 per each window, make sure that it is wide enough to cover the window)
  2. 1 tension rod or curtain rod (I used the tension rod because we have concrete walls)
  3. Scissors
  4. Paper clips or sewing machine/needle & thread


 Here's how to make it:

1. Start off by hanging your tension rod or curtain rod. Make sure when you place it at the top of your window that you have enough space to slide the bamboo mat through the top.


I used my finger as a guide of how far away I place the tension rod from the top of the window so that both of my tension rods were equally placed.


2. Next you're going to want to hold up your mat next to your window so you know how much of the excess you need to trim off.


**Note** If you don't want the colored binding to be left on the shad make sure you trim it off first before determining how much extra you need to trim off.

3. Mark or hold the mat where the extra needs to be trimmed off.


 4. Start trim the mat where you had marked using the threads in the mat as a guide. Mine just happened to be right on one of the threads so I just followed it all the way down.


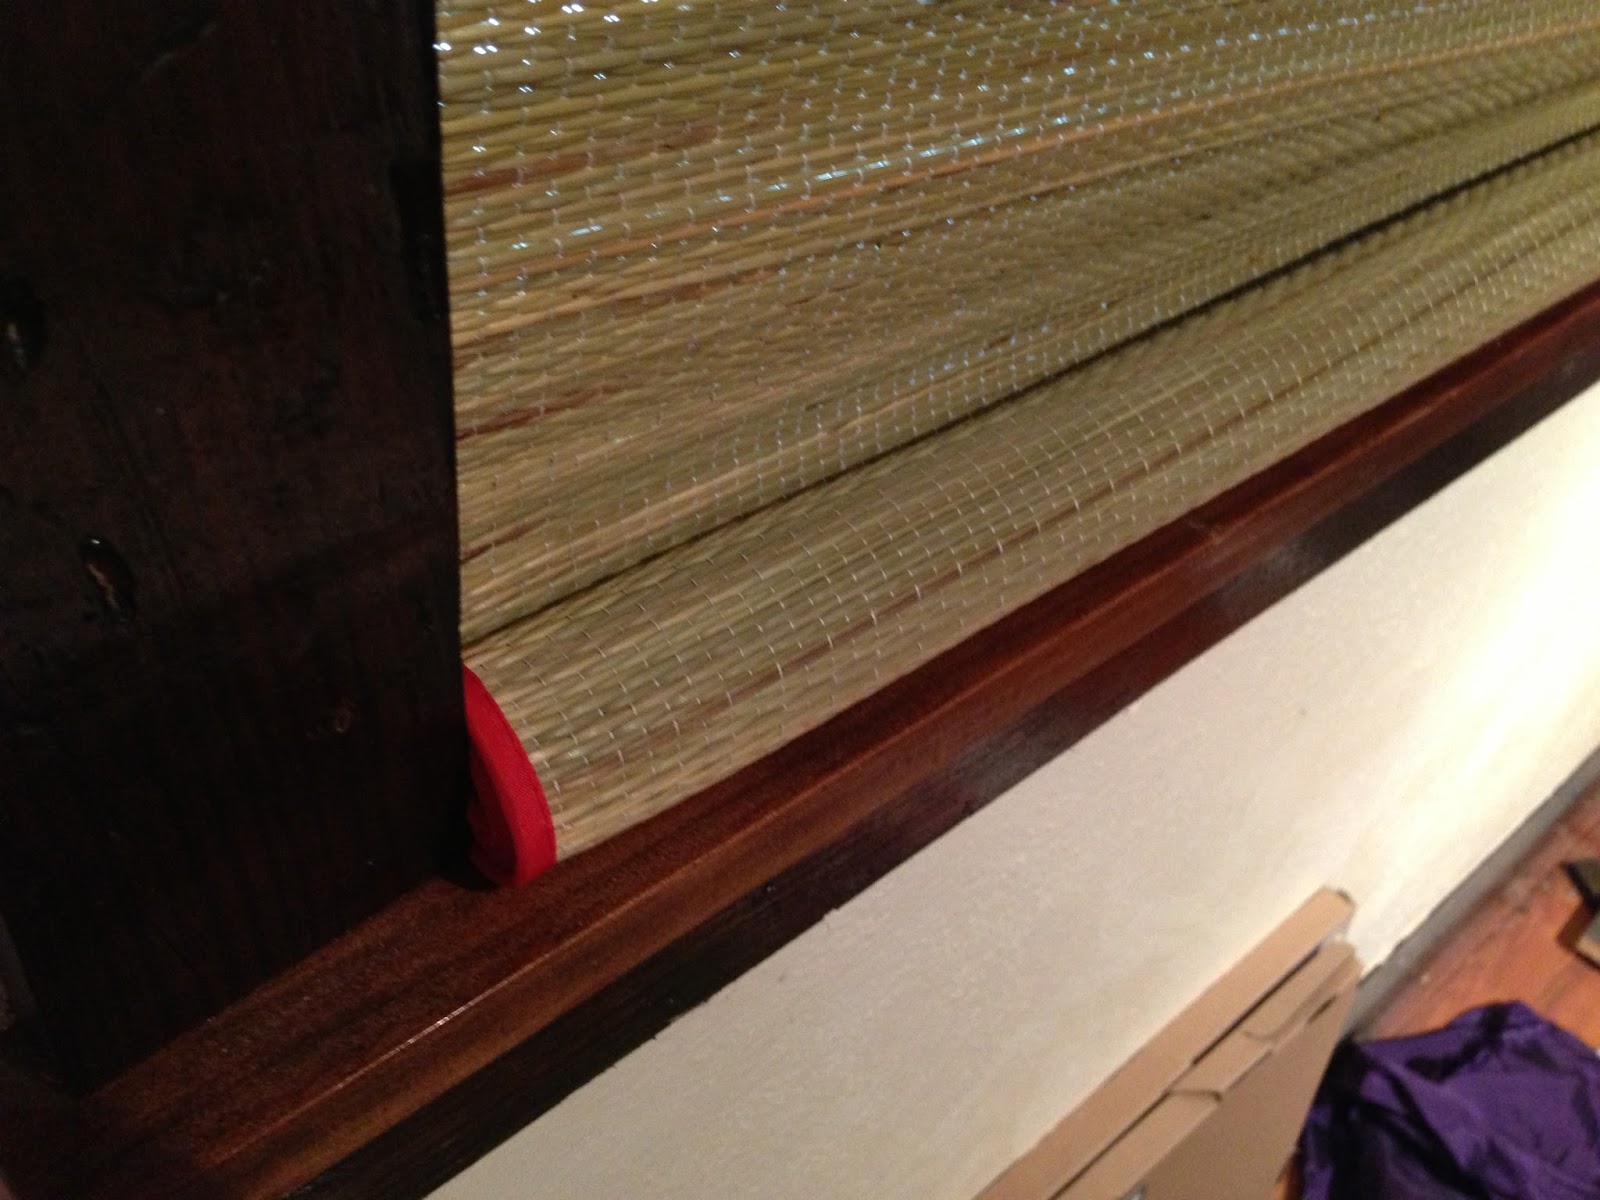
5. Once you have trimmed your mat, slide the mat through the space between the top of your window and the tension/curtain rod.


6. Pull the mat down to the desired length you want. I left mine about 5 inches from the top but because the mat is super long you can also just pull it all the way down so that the middle of the mat is hanging from the top of the rod.


7. Now you can either clip the overlap together with the main part of the mat or you can sew it together. Because I am lazy and just needed a quick fix for the time being I just used these ultra chic cow paper clips to hold the shade in place.


8. Now you can either roll up the bottom or trim it to your liking.


And that's it! See super simple! This project would be great for dorm rooms or apartments because they are cost efficient, time saving, and easy to take down. I've also thought about hanging some ties (possibly made from fabric) from the top to hold up the shade when I would like to let a little light through.


Tuesday, November 6, 2012

Nesting: Made the Baby Bumper

While working/sewing my way towards having the baby's room finally complete, I was down to only needing to recover the crib bumper and crib skirt. For some reason I am not looking forward to making the crib skirt and decided to go with the bumper. Like my quilt I posted previously, I wanted to cover the bumper with elephants, but instead of doing it with a gray fabric and white elephants, I decided on doing it with a white fabric and gray elephants. I wanted to keep it not matching 100% even though the colors were the same. I also decided to not make the whole bumper with white fabric but to make one whole side with the leftover gray fabric I used in the quilt to tie it together.

So after a couple days of brainstorming, I got to work. I started with taking the crib bumper I had and attacking it with a seam ripper down the longest side. Once I was able to get the whole bumper cover off, I used it as a guide for how big to cut the fabric for the new bumper. Once all of my pieces were cut out (which consisted of 6 rectangular cuts of each fabric) I got to work stamping on the elephants as I did with the quilt.


I took a gray acrylic paint, smeared it all over a plate, then took my elephant cookie cutter, dipped it into the paint, and stamped it onto my white fabric horizontally (or longways).


I ended up adding some variety to my stamping by turning my cookie cutter over and making one line of the elephants go in the opposite direction. Once all of that had dried, I took some blue ric-rac (because Walmart didn't want to carry blue pipping I got creative) and sewed it along one short edge of the bumper piece and then down the longest side of the bumper (only on the right side of the white fabric). I was able to do this by lining up the edge of the ric-rac with the edge of the fabric and then sewing a 1/4 inch seem (which went straight down the middle of the ric-rac).


Once all the ric-rac was sewn onto the white side of the bumper (except for the bottom longest side), I sandwiched the white fabric with the gray fabric right sides together so that the ric-rac was in between.


I then sewed the bumper together, keeping one of the small ends open for stuffing and turned the fabric inside out and ironed it to make sure it was the right size for the stuffing I saved. This is what the ric-rac looks like when you use it as piping.


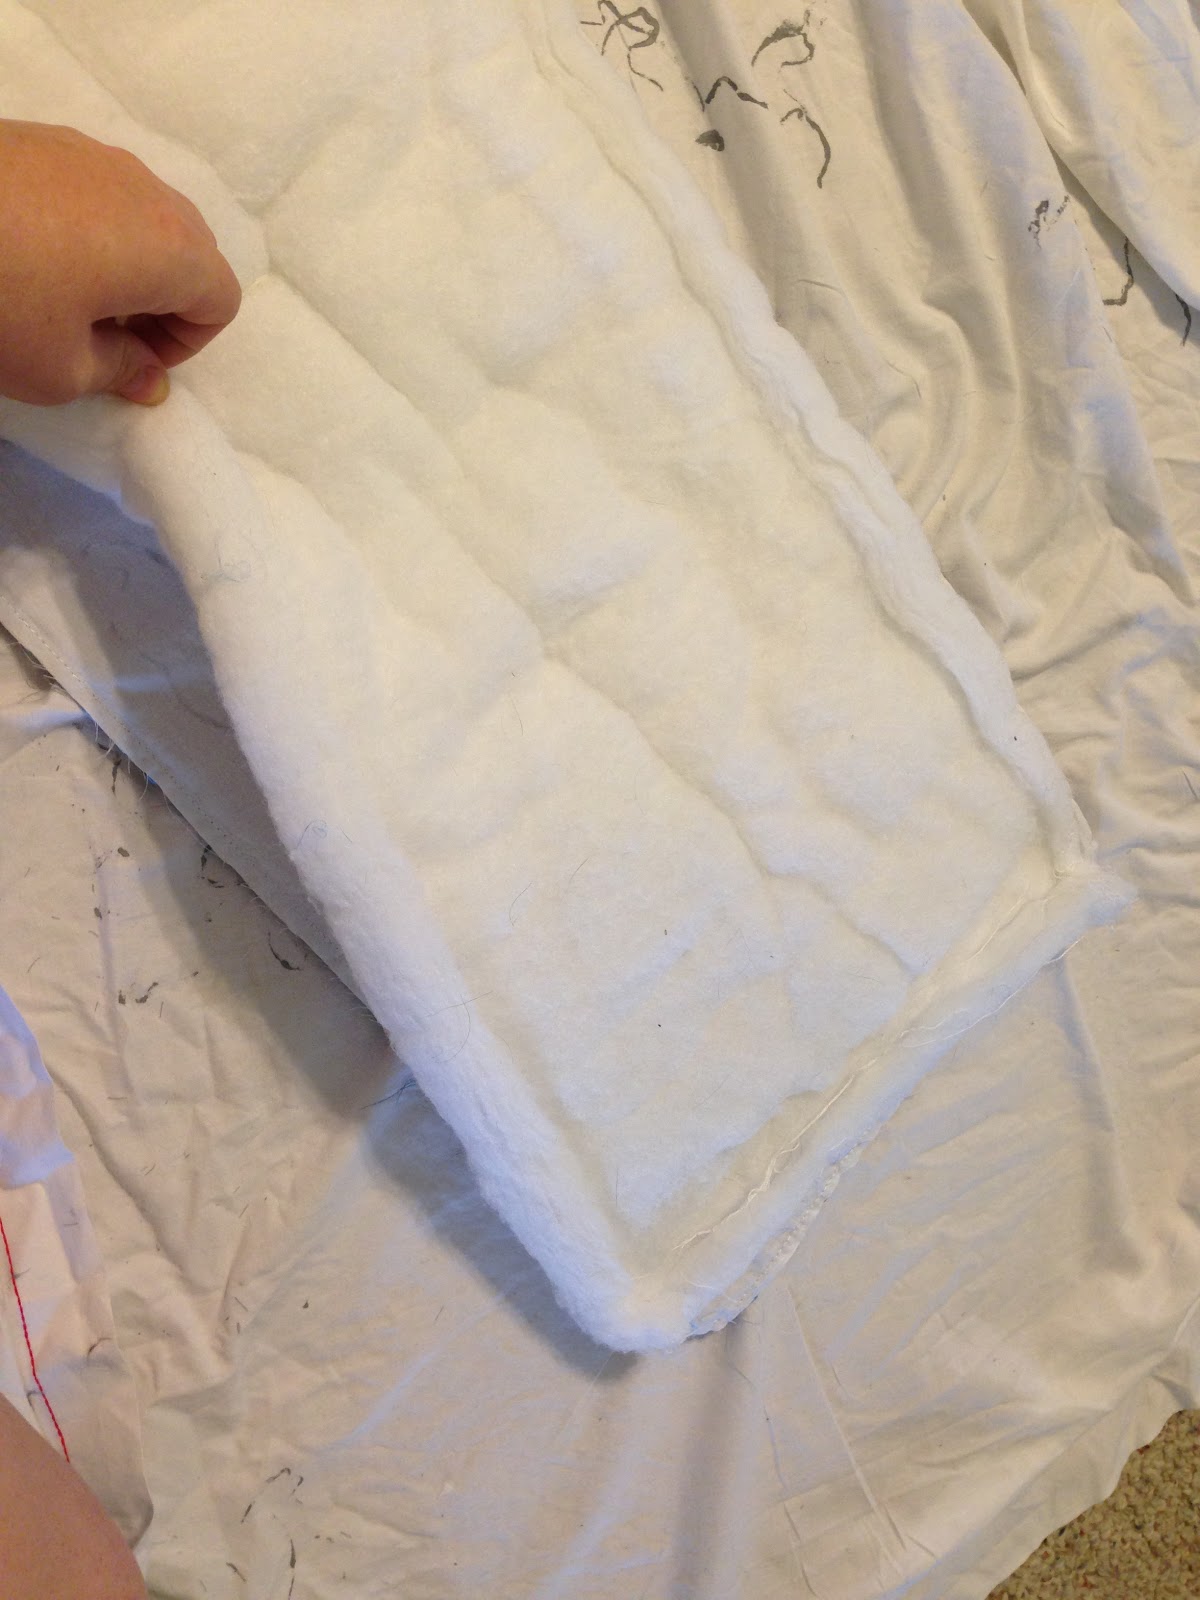
After I had ironed the fabric, I turned it back inside out and did one last check to make sure the fluff would fit.


I turned the bumper right side out and stuffed the fluff into the bumper pinning it along the way so I could get a good fit.


Once I had it pinned, all I had left to do was to sew up the open end and add some ribbon straps with velcro on the ends to attach the bumper securely to the crib. If you are making your own you need to make sure that the bumper is pulled tightly around the side of the crib so you don't run the risk of suffocating your baby.

Below is a picture of the quilt, bumper, and mobile that I redid. When put all together it looks so darn cute! Now I just have to wait for little baby Liam to arrive so he can enjoy it too :)


♥ Mrs. Suzie

Monday, October 29, 2012

Recovering a Lamp with Hemp Cord

So I was given some nursery items (Dust ruffle, mobile, quilt, etc.) that came with a matching lamp from one of my cousins. The lamp was covered in nautical animals which was cute but wasn't the direction I was going for Baby Liam's nursery. So then took the nautical animals off the lamp and did some creative thinking with some hemp cord I had laying around.


I started hot glueing the hemp cord to the base of the lamp and wrapped and glued and wrapped and glued.


Once I wrapped all the way to the top, I wrapped it one more time to build up a layer of hemp cord to be level with the surface of the top of the lamp.


Then I continued wrapping and glueing the hemp cord around the top of the lamp. I tried keep all sides even while glueing around the lamp.


Once I got close to the end I cut the hemp cord from the ball and glued the tail down before glueing down the rest of the hemp cord around the lamp post.


And VOILA! Beautiful, rustic lamp! This will go so nicely with my mobile I made last week. Stay tuned for pictures of it along with my bumper once I get it re-covered.


♥ Mrs. Suzie

Monday, October 1, 2012

DIY Enzyme Cleaner Review


So after waiting a long two weeks for my Enzyme Cleaner to be ready, it's finally done! I was so excited the first thing I did this morning was prepare my Enzyme Cleaner in concentrate form. This basically consists of you straining the enzyme mixture through a thin cloth and storing it. That's it!

To make my All-Purpose Cleaner for around the house, I poured 1/2 cup of the liquid into a spray bottle and then filled the spray bottle the rest of the was up. I was using a 32 oz. spray bottle so my ratio was 1:7 (enzyme:water). You don't have to use that much enzyme, in fact on my last post on the enzyme cleaner I told you all you had to use was a 1:10 ratio. It's just whatever is your personal preference.

If you would like to see how the Enzyme cleaner did in my bathroom and in my kitchen you can watch my Youtube video below. Click here for the recipe for Enzyme Cleaner.


♥ Mrs. Suzie

Friday, September 21, 2012

Making the Bun in the Oven a Blanket

So lately I've been hard at work making things for our soon-to-be addition to the family. As of this past week, it has consisted of brainstorming what the baby's quilt should look like. I know I wanted to do something with elephants and the colors blue, white, and gray so I searched the internet for ideas. I finally just decided to make up my own because their weren't very many on the internet that looked fit for a nursery.

I started with my elephant cookie cutters that I bought a couple months ago, some white fabric paint, and an old gray sheet. I dipped the cookie cutters in the paint and stamped them onto the fabric longways in variating rows. Once that dried I added a 4" white border from another old sheet I had lying around.


If you have watched my Cloth Revolution Diaper Tutorial you would know about my blue and white polka dotted "microfleece"situation. Well after having to find a use for it I felt like this quilt was perfect for the use of that fabric. So I sketched out half of an elephant on the back of it, cut it out, "heat bonded" it to the fabric I just got finished stamping, and sewed a blanket stitch around the border in a dark gray thread.


Here's a close up so you can see the endless hours and hurt fingers I put into this simple border.


Then I decided the quilt needed something else. So I took some more embroidery floss and made rough thick stitches with 1/2" places in between. Here you can see it getting started and the quilt as a whole.


Here's a close up of the stitching. Needless to say there were more soar fingers involved in this process (I guess that's why people wear thimbles?).


So I eventually added enough stitching to the border to make me satisfied using a pattern of: Light blue, Blue, Dark Gray, Dark Gray, Blue, Light Blue. Then I pinned the back of the quilt to the front. This was just a piece of white fabric (left over from the sheet I cut up) so I didn't take pics.


Then I got to work pinning the binding around the quilt. I choose light blue because I didn't want the quilt to be predominantly gray.


Once I got that stuff sewn on using my sewing machine (might I say binding isn't as easy as it looks to put on) I was finished. I think it turned out just gorgeous. Now I just have to work on the mobile, the bumper, and the lamp. Good thing I still have until January!


♥ Mrs. Suzie

Wednesday, September 19, 2012

How to make your own enzyme cleaner!


So lately I've been on this kick to make my own house cleaning products. After revising my laundry detergent post and seeing how amazingly cheap it is to make, I wanted to make some more cheap products around the house because I go through that stuff like water! After numerous hours of searching and experimenting I found a recipe for Citrus Enzyme cleaner. Words can't describe how excited I was. (Mostly because when you cloth diaper it is good to have an enzyme cleaner to get the "funk" smell out of them and that stuff isn't cheap!)

This cleaner is very comparable (pretty much identical!) to other enzymes sprays such as BacOut. This spray runs about $9 per bottle NOT CONCENTRATED! The ingredients are enzyme cultures, Lime extract, Stabilizers, Surfactants, and water (so basically lime, water, and sugar). After researching enzyme cleaner I found out that pineapples have the most enzymes and make a better cleaner.

So I guess you guys are ready for the recipe:

What you will need is:

  1. A container with a lid that can hold 2 liters (I used an old milk jug)
  2. 1 1/2 to 2 cups of fruits scraps (such as lime peels)
  3. 7 tbsp of brown sugar (this is to feed the enzymes)
  4. 1 tsp of yeast (doesn't matter which kind)
  5. 1 liter of water
  6. funnel
  7. 2 weeks time!
How to make it:
  1. Cut up your fruit scraps so that they will fit into the opening of your container (I used pineapple and lime!) and put them into a measuring cup to measure out about 2 cups of fruit scraps.
  2. Stuff the fruit into your container and add the yeast and the brown sugar into the container using a funnel.
  3. Pour in your 1 Liter of water through the funnel to collect any extra sugar and yeast.
  4. Screw the lid on and shake the container to mix everything together.
  5. Loosen the lid to let any gas buildup flow out of the container.
  6. Label with the date you made it and the date for 2 weeks from the day you made it (this is when it will be ready for use).
  7. Store in a cool, dark place (such as your pantry).
  8. Shake the container everyday for the first week making sure when you put it up for storage that the lid is loosened (We don't want explosions people!).
  9. Once the two weeks are up strain your enzyme cleaner and store for further use.
How to use it:
  • All purpose cleaner = 1 part enzyme to 10 parts water.
  • Stains and Odors = just dilute
  • Dishes and Laundry = 1/4 of enzyme
  • Drain blockages and smell = concentrated or use strained fruit scraps
  • Mopping floors = 1 part enzyme to 20 parts water
  • Face cleaner = 1 part enzyme to 2 parts water
  • Insect repellent = unse diluted
  • Clean washing machine = 2 cups enzyme in detergent drawer (run through normal cycle at 98 degrees F)
  • Glass cleaner = 1 part enzyme to 3 parts water
If you would like to watch how I made my enzyme cleaner you can view it here:


Check back in two weeks for my review on this cleaner and it's wonderfulness!


♥ Mrs. Suzie

Thursday, September 6, 2012

Cloth Revolution Diaper tutorial

I FINALLY have made a cloth diaper tutorial using the Cloth Revolution pattern. I used 1 1/2" velcro in the tute while following the directions for the pocket diaper. I absolutely love it and will make more! So here is the video, let me know what you think :)


♥ Mrs. Suzie

Thursday, August 30, 2012

Mermaid Tail Towel Tutorial

I know this is a little late in the year but I figured little girls could not only use this towel when getting out of the pool in the summer but also use it for dress-up in the winter. I have made the tutorial on youtube so I am posting the video below along with the free pattern I created. Have fun!


Click here for the pattern.

Let me know what you guys think and if you end up making your own mermaid towel be sure to send me pictures so I can feature them on my video :).


♥ Mrs. Suzie